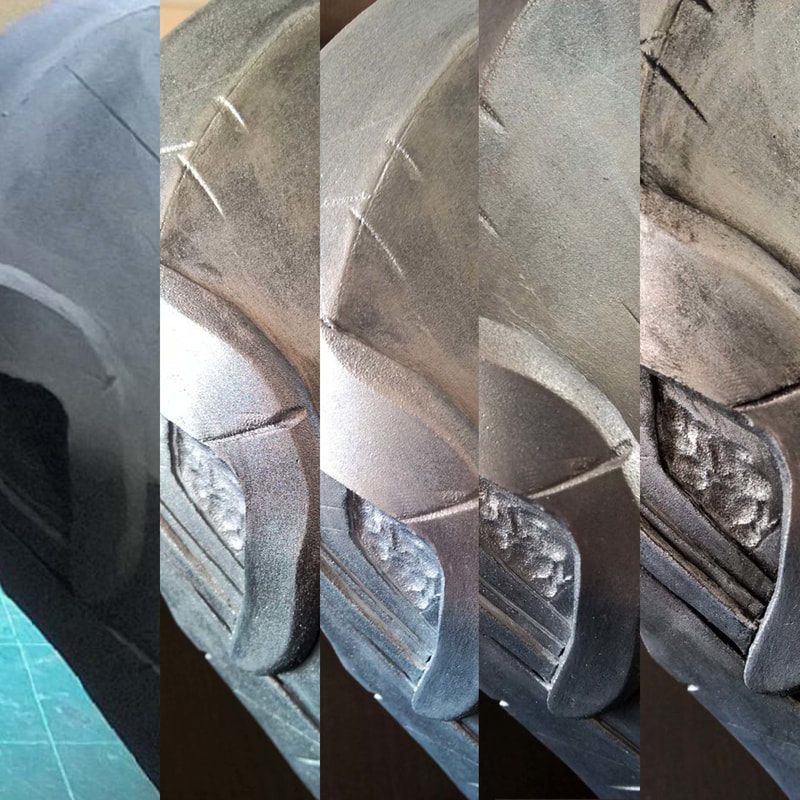
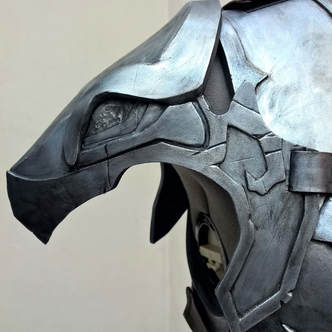
 Hey all! I decided to write a short blog about the paints I used for the Nordic armor. Why? Because I found out some things that are quite interesting and they might help others with their paint related choices. First, the paints I used. Van Bleiswijck Holland Acrylic Black. Waterproof and cheap. I used this paint as a primer for the foam. Winsor & Newton Galeria Acrylic Silver. Highly pigmented. Waterproof. Nice shine. Isn't too expensive. 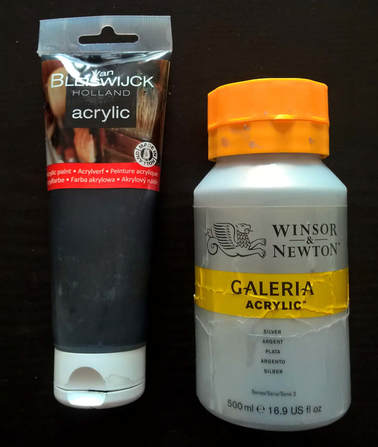
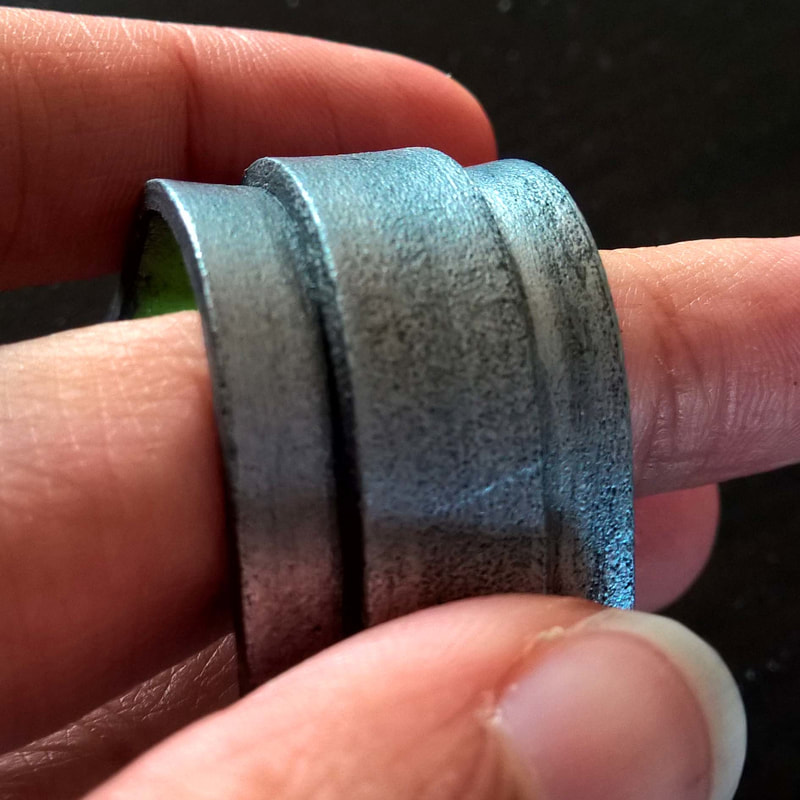
I love using this combination of paints because it is cheap, I don't have to buy expensive primers and technically you don't have to seal it. *tip - Using the acrylic as a primer won't give you a completely smooth surface like plastidip. This works great for old metal looking armor, but I don't recommend it for, for example, super smooth sci-fi armor.* Now this is where (I think) it get really interesting. The painted foam stayes quite flexible. You can bend it quite far before the paint starts to crack. HOWEVER once the painted foam piece gets wet and dries again it becomes very hard. It loses it's flexibility. Once it bends it will crack.
I wore the armor to the Elf fantasy fair once. It was pooring. I was litteraly soaked within minutes (and walked around in the rain for a few more houres). Because the armor pieces are not supposed to bend anyway the paint stiffening wasn't really a problem. The next day when fully dried my armor looked fine except for one part. For some reason that one corner of the armor was not waterproof? The paint had started to form small bubbles?!  Luckily they are really small bubbles, in a not so obvious place, on an armor that is supposed to look worn, but be warned!
This no priming - no sealing technique works fine long as you stay out of the rain! Hope this helps :)
0 Comments
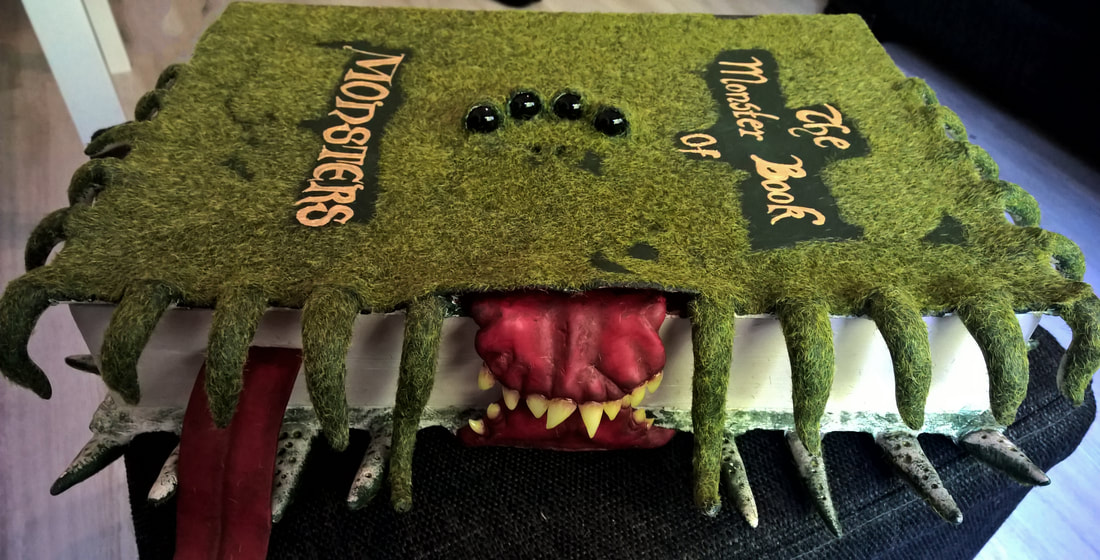
Hello! For my first blog post I decied to show you guys how I made The Monsterbook of Monsters. Excited yet? I actually kinda am!
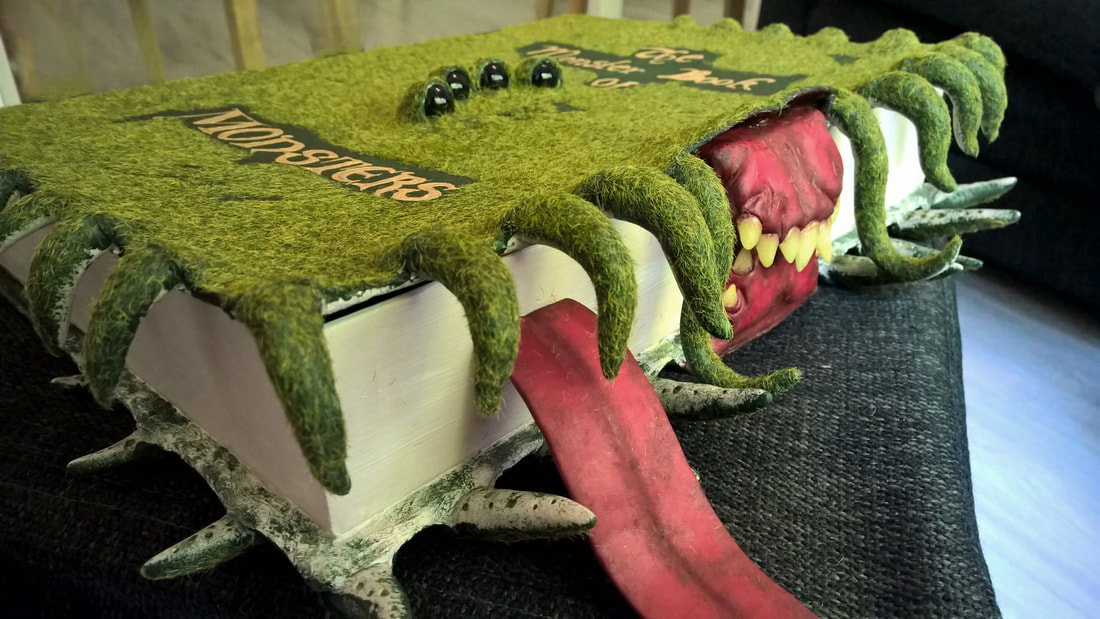
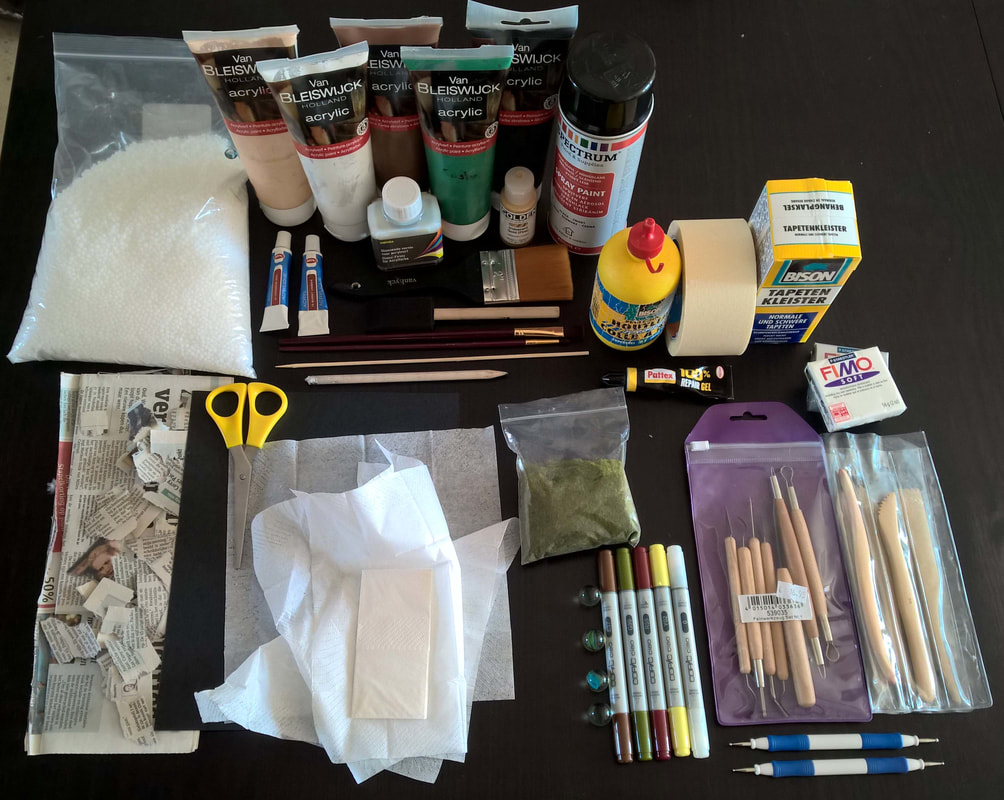
- White paper napkins. The layers pulled appart so they are really thin. - Old newspapers. - Thicker paper for the upper lip. - Scissors. - 4 marbles, black if you have them. (2 slightly smaller than the other two). - Black spray paint if you didn't have black marbles. - Paint in the colors green, crimson 'old paper' and gold. - Varnish. - Brushes in different sizes, for both paint and glue. i used one small, one a bit bigger and one very large. - Small sponge. - Skewer. - Copic markers (I used R59, Y02, G99, E37 and 0 to blend it.) - Bag of miniature grass.
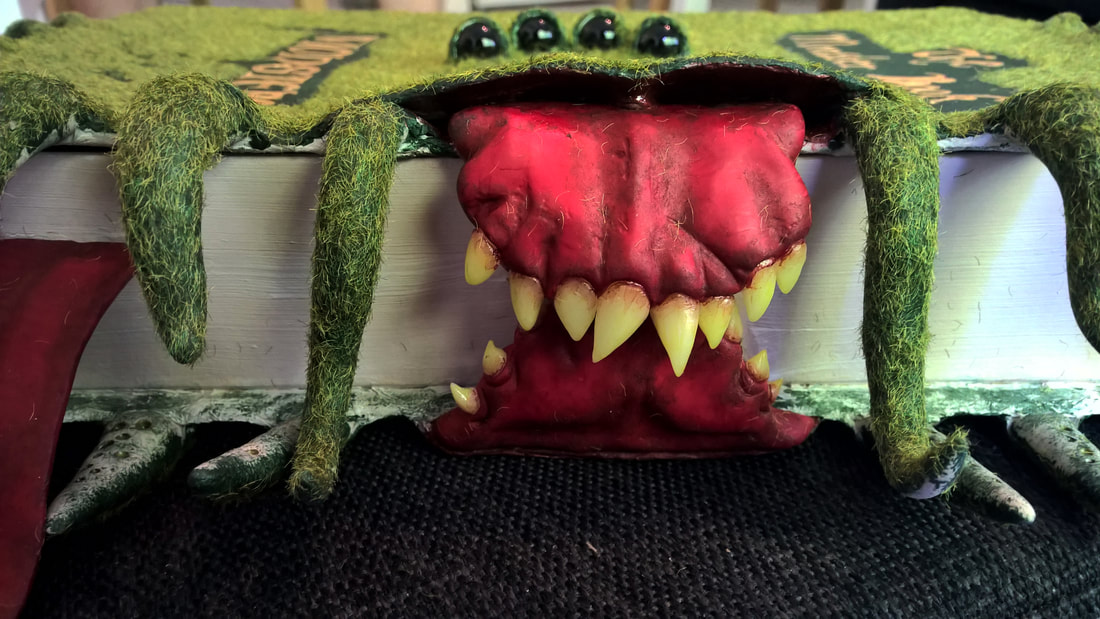
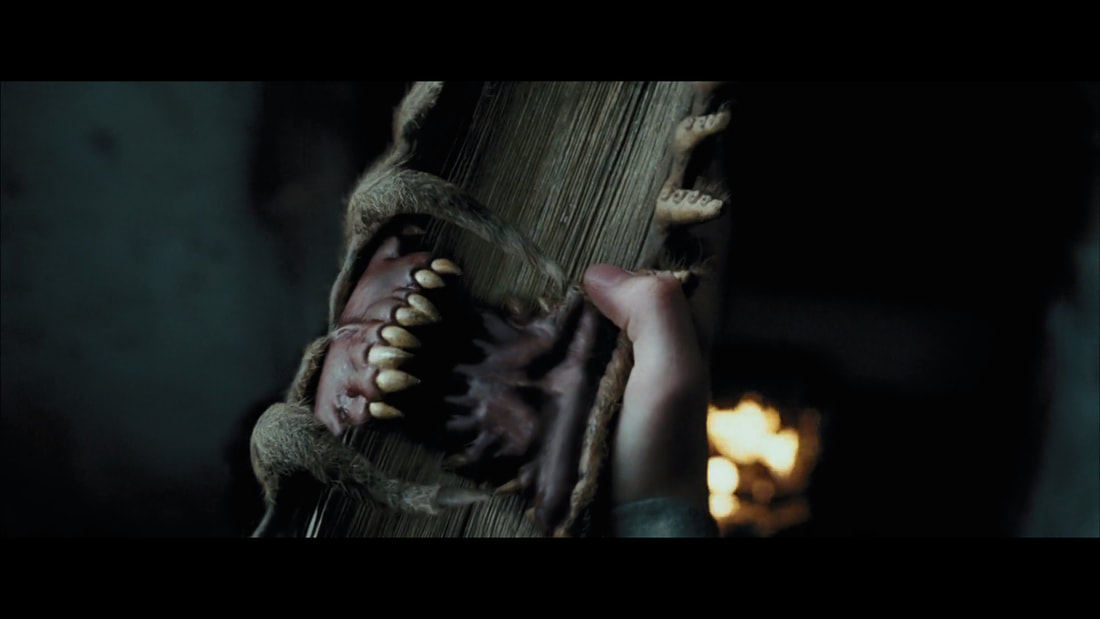
clay at the bottom/top (depending on which jaw you are working on) to make a ridge with which you can glue it to the book. Notice how the upper jaw comes over the lower jaw a little bit. After that I did the tentacles. As you can imagine they are a lot easier to shape. I used an imbossing tool to make the small holls that are supposed to be the suckers. Once everything is sculpted put in it the oven to harden and stick em on the book with the strong glue. THE STRONG GLUE!! Don't use the wallpaper adhesive for that or they might fall off again. 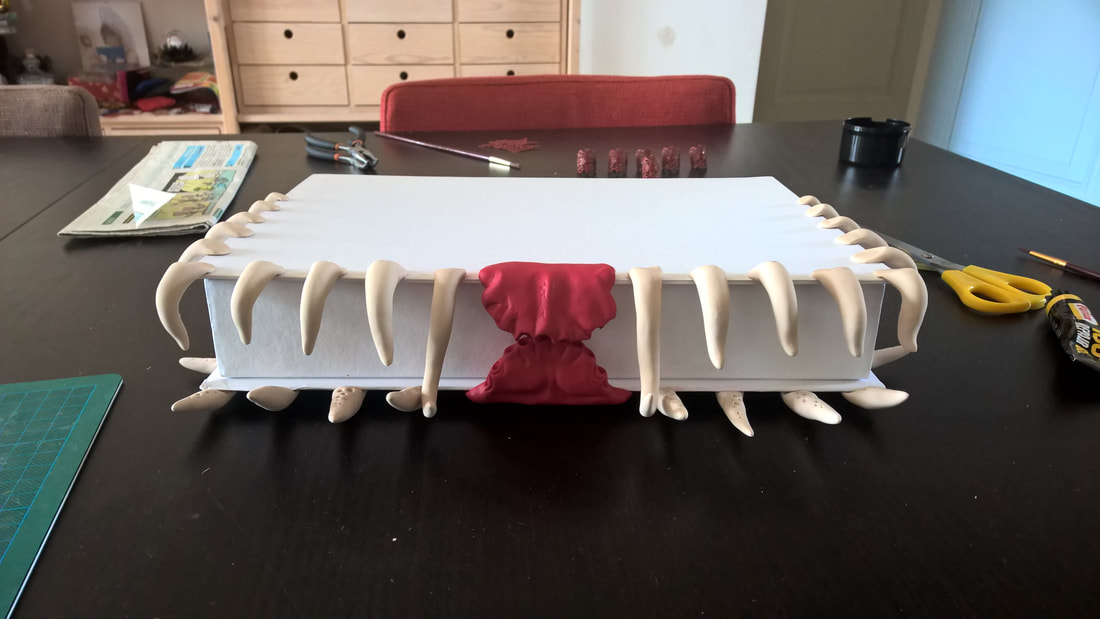 Looks at the toothles book. Not so scary now huh!
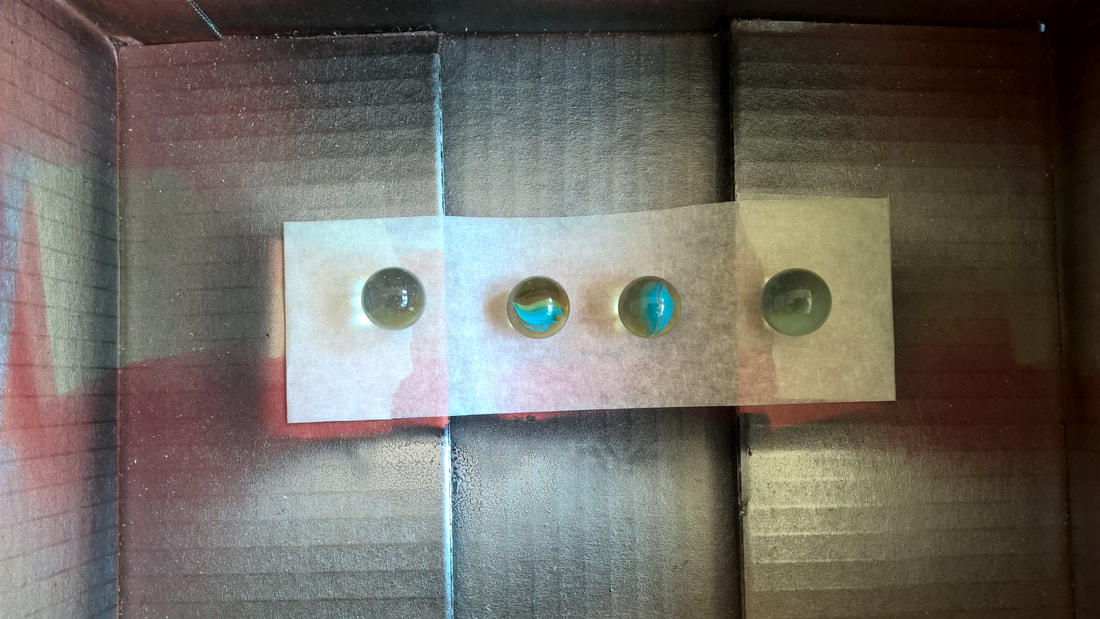
Now go ahead and cover the base of the mouth and tentacles with pieces of newspaper and wallpaper adhesive to blend them into the shape of the base and make it look as if they are actually growing out of the book. If find that it works best if you tear the newspaper instead of cutting it with scissors, as tearing will give the paper softer edges that are way easier to blend. While that is drying you can shape the teeth. It is easiest to do that before the eyes are on because now you will still be able to flip the book to it's back. The teeth are made from polymorp plastic. Throw some of the plastic orbs in hot water, about 5 to 10 orbs is enough (for one tooth), depending on the size, and wait for them to turn translucent. They are now ready to be shaped and molded. No really good tips here. Just take the polymorph and jam some into one of the holes in the gums, shape it to a tooth shape and you're done! I found that some of the teeth would stay in very secure while others i had to glue in when they were fully hardened. When the teeth are in you can good time to decide where you want the eyes to be and stick em on with the strong glue. If you didn't have any black marbles, like me, you are going to want to spray them black with a high gloss black spray paint. I sprayed on two layers to be
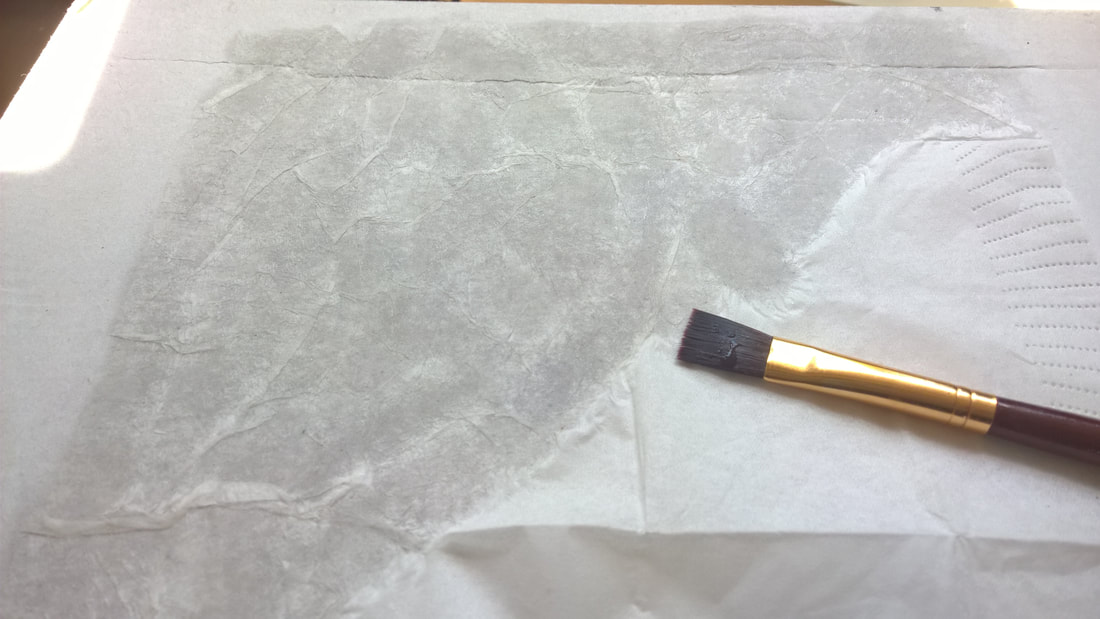
*Tip: Stick the marbles on some paper tape to the bottom of a cardboard box. This will prevent them from rolling around while painting and drying.* You can see that the eyes of the book aren't set in a straight line, but rather in a half circle. Now take the paper napkin layers and the wallpaper adhesive and start shaping the nose and the lower eyelids. It will look more natural when you start with the lower eyelids and you shape the upper eyelids over them. For the shaping I only used a flat brush. After shaping everything I added some newspaper to the upper eyelids to make them more solid.
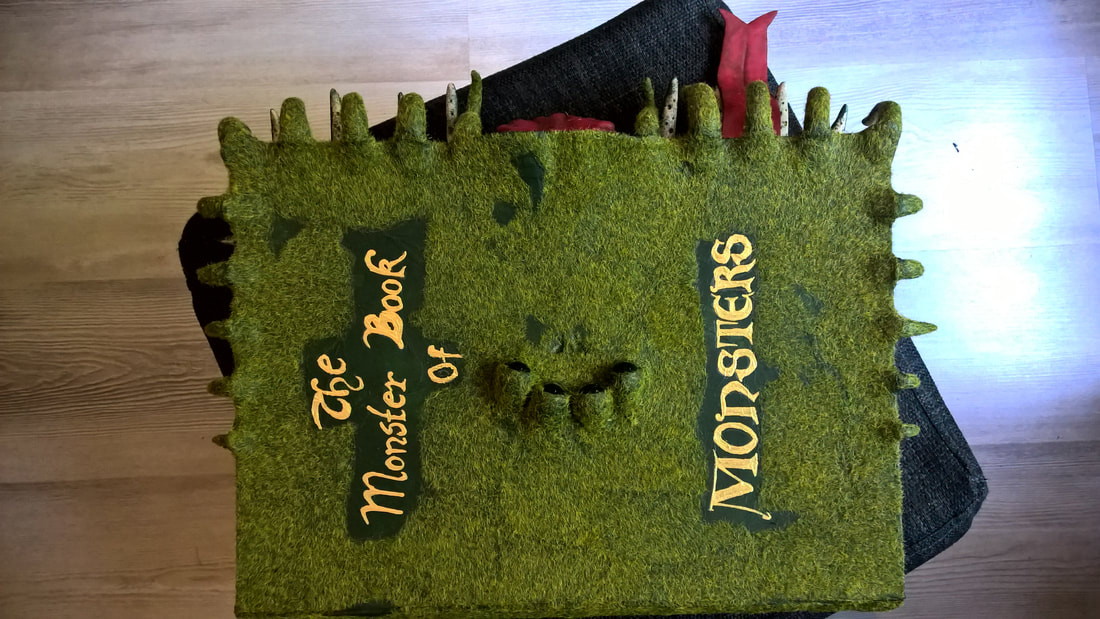
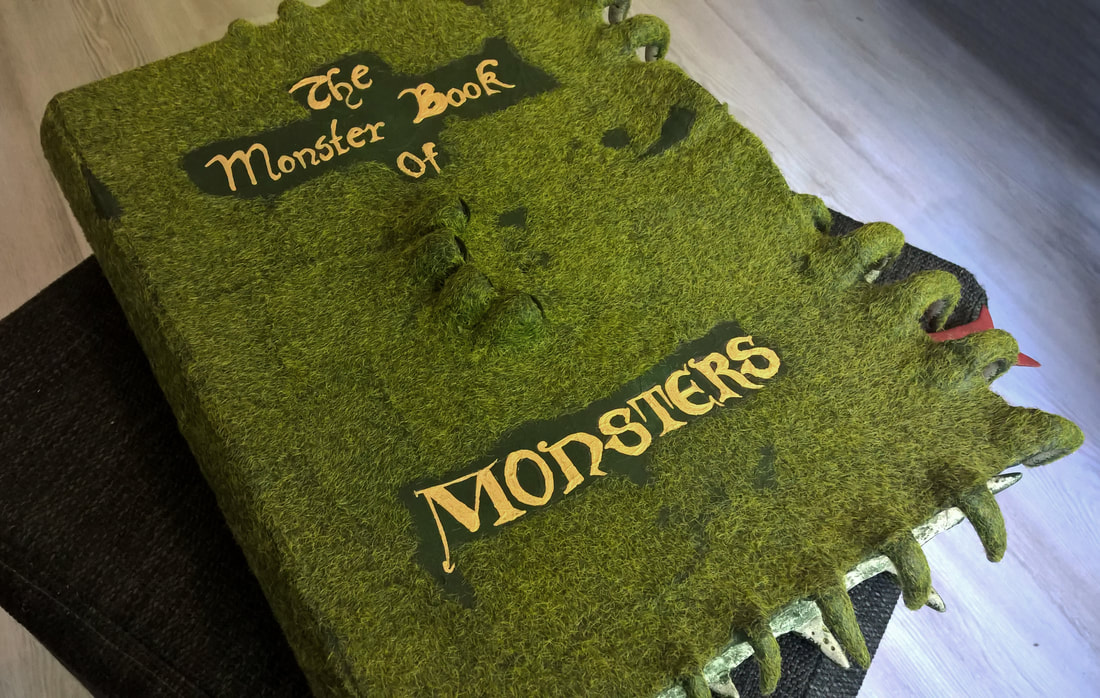
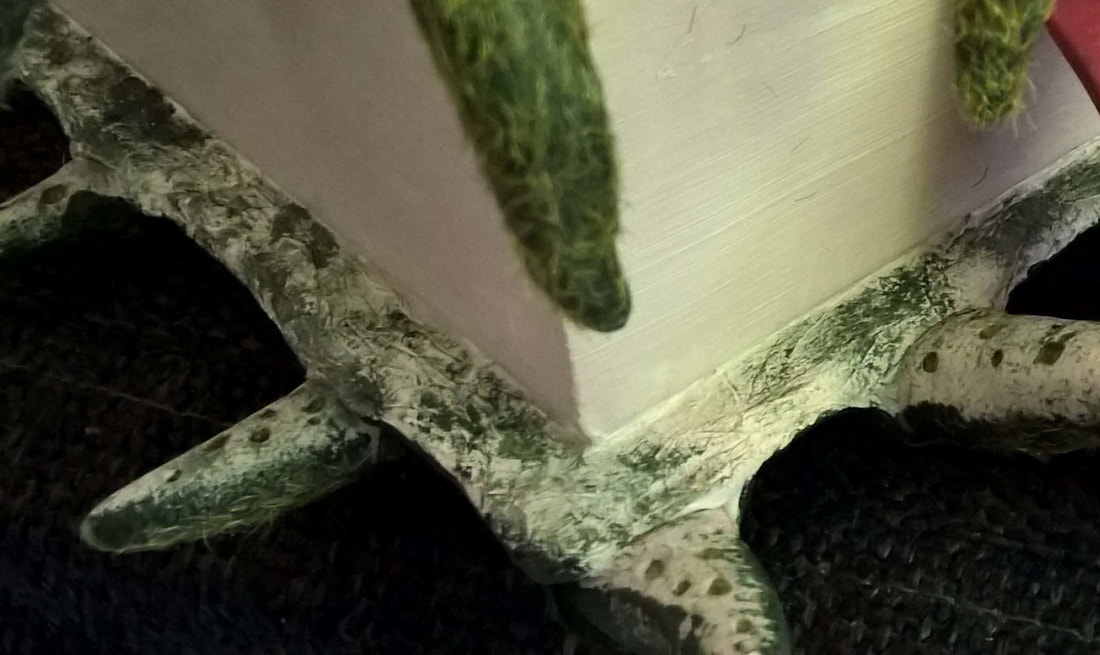
wet looking. Don't be afraid to add some brown (E37) to the base of the teeth to make them look a bit gross. I used a G99 marker to fill in the sucker holes on the tentacles. Once you've done that and all the glue verywhere on the book has dried you can move on to painting the rest. Mix a green color of your liking and cover that thing! Well... Most of that thing. Avoid the obvious parts. For the tentacles I used the small sponge to dab the paint on. This leaves the edges soft, since you won't be covering the whole of the tentacle and it also gives some texture. (Which you won't be seeing after you've added the hairs.) Now define where you want the hairs to be. I simply used a pencil to draw on the places I wanted to be without hairs. The space for the title is most importand ofcourse. I added the golden letters last, but I suppose you could also do that before adding the hairs if you find that easier.
Now take your glue (the kinda liquid not so fast drying one) and spread it on, leaving the places where you don't want any hairs empty. The glue I used was actually pretty bad for this because it had a really short drying time so I had work one patch at a time. I can imagine that if you have glue that doesn't dry as fast you can glue the whole book and cover it with hairs in one go. Lastly I painted the title on with gold paint. I used a skewer for this because I was able to make cleaner,thinner lines with that. And there you have it! Your own Moster book of Monsters! 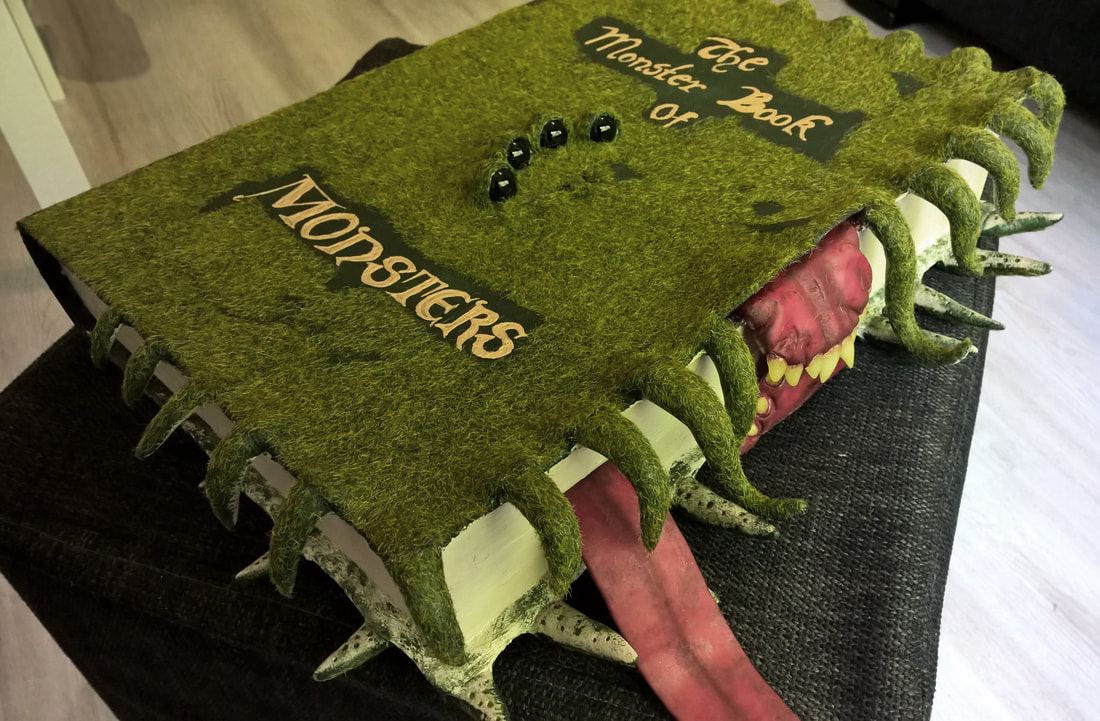 Sorry if it's a bit vague. This is my first tutorial and i didn't make enough progress pictures.
|